
What is a Website Agent?
It is an LLM-based agent that you can embed directly into your website to provide instant support and answers to your visitors. The agent:- Learns from your company’s knowledge sources including website content, PDFs, YouTube videos, and other documents
- Provides real-time responses to customer queries based on your specific business information
- Integrates seamlessly with your website through a simple embed script
- Answers in your brand’s voice in a natural and conversational manner
Setting Up Your Website Agent
In the Droxy dashboard, go to the Agents section and click on +Add. Then select Website Agent.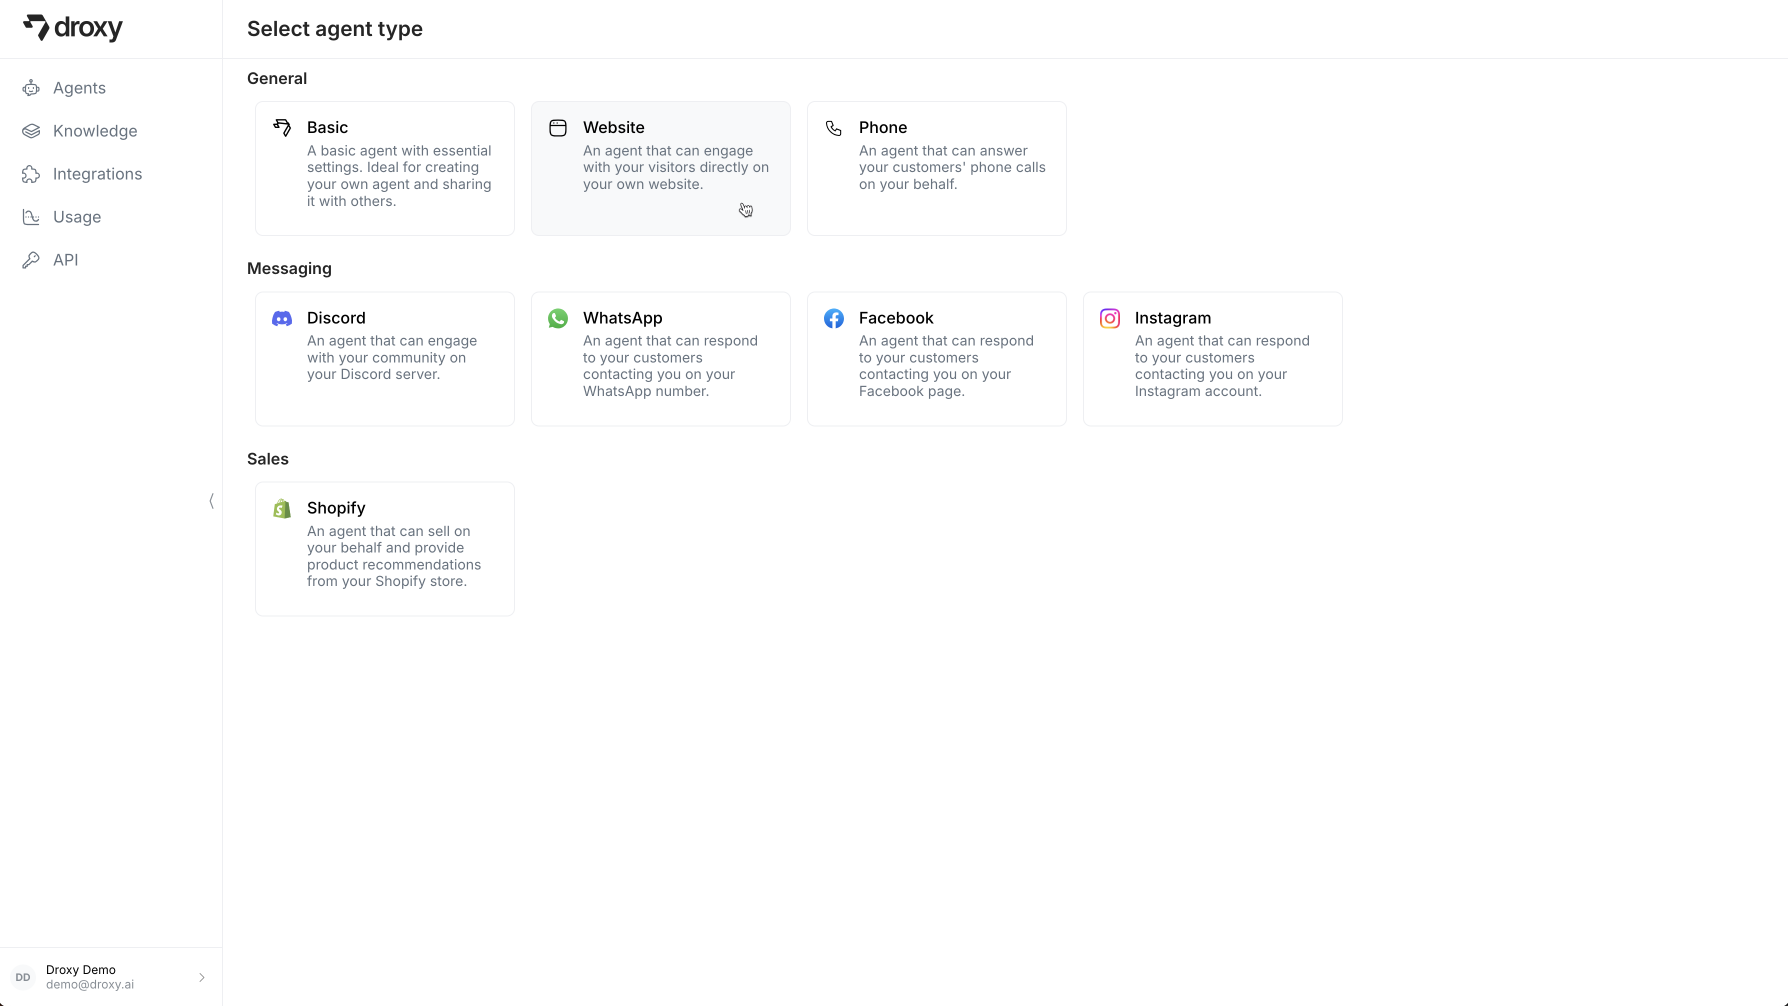
1. Knowledge Configuration
Before your agent can assist visitors, you’ll need to ground it with knowledge. This will help it understand your business and answer questions more accurately.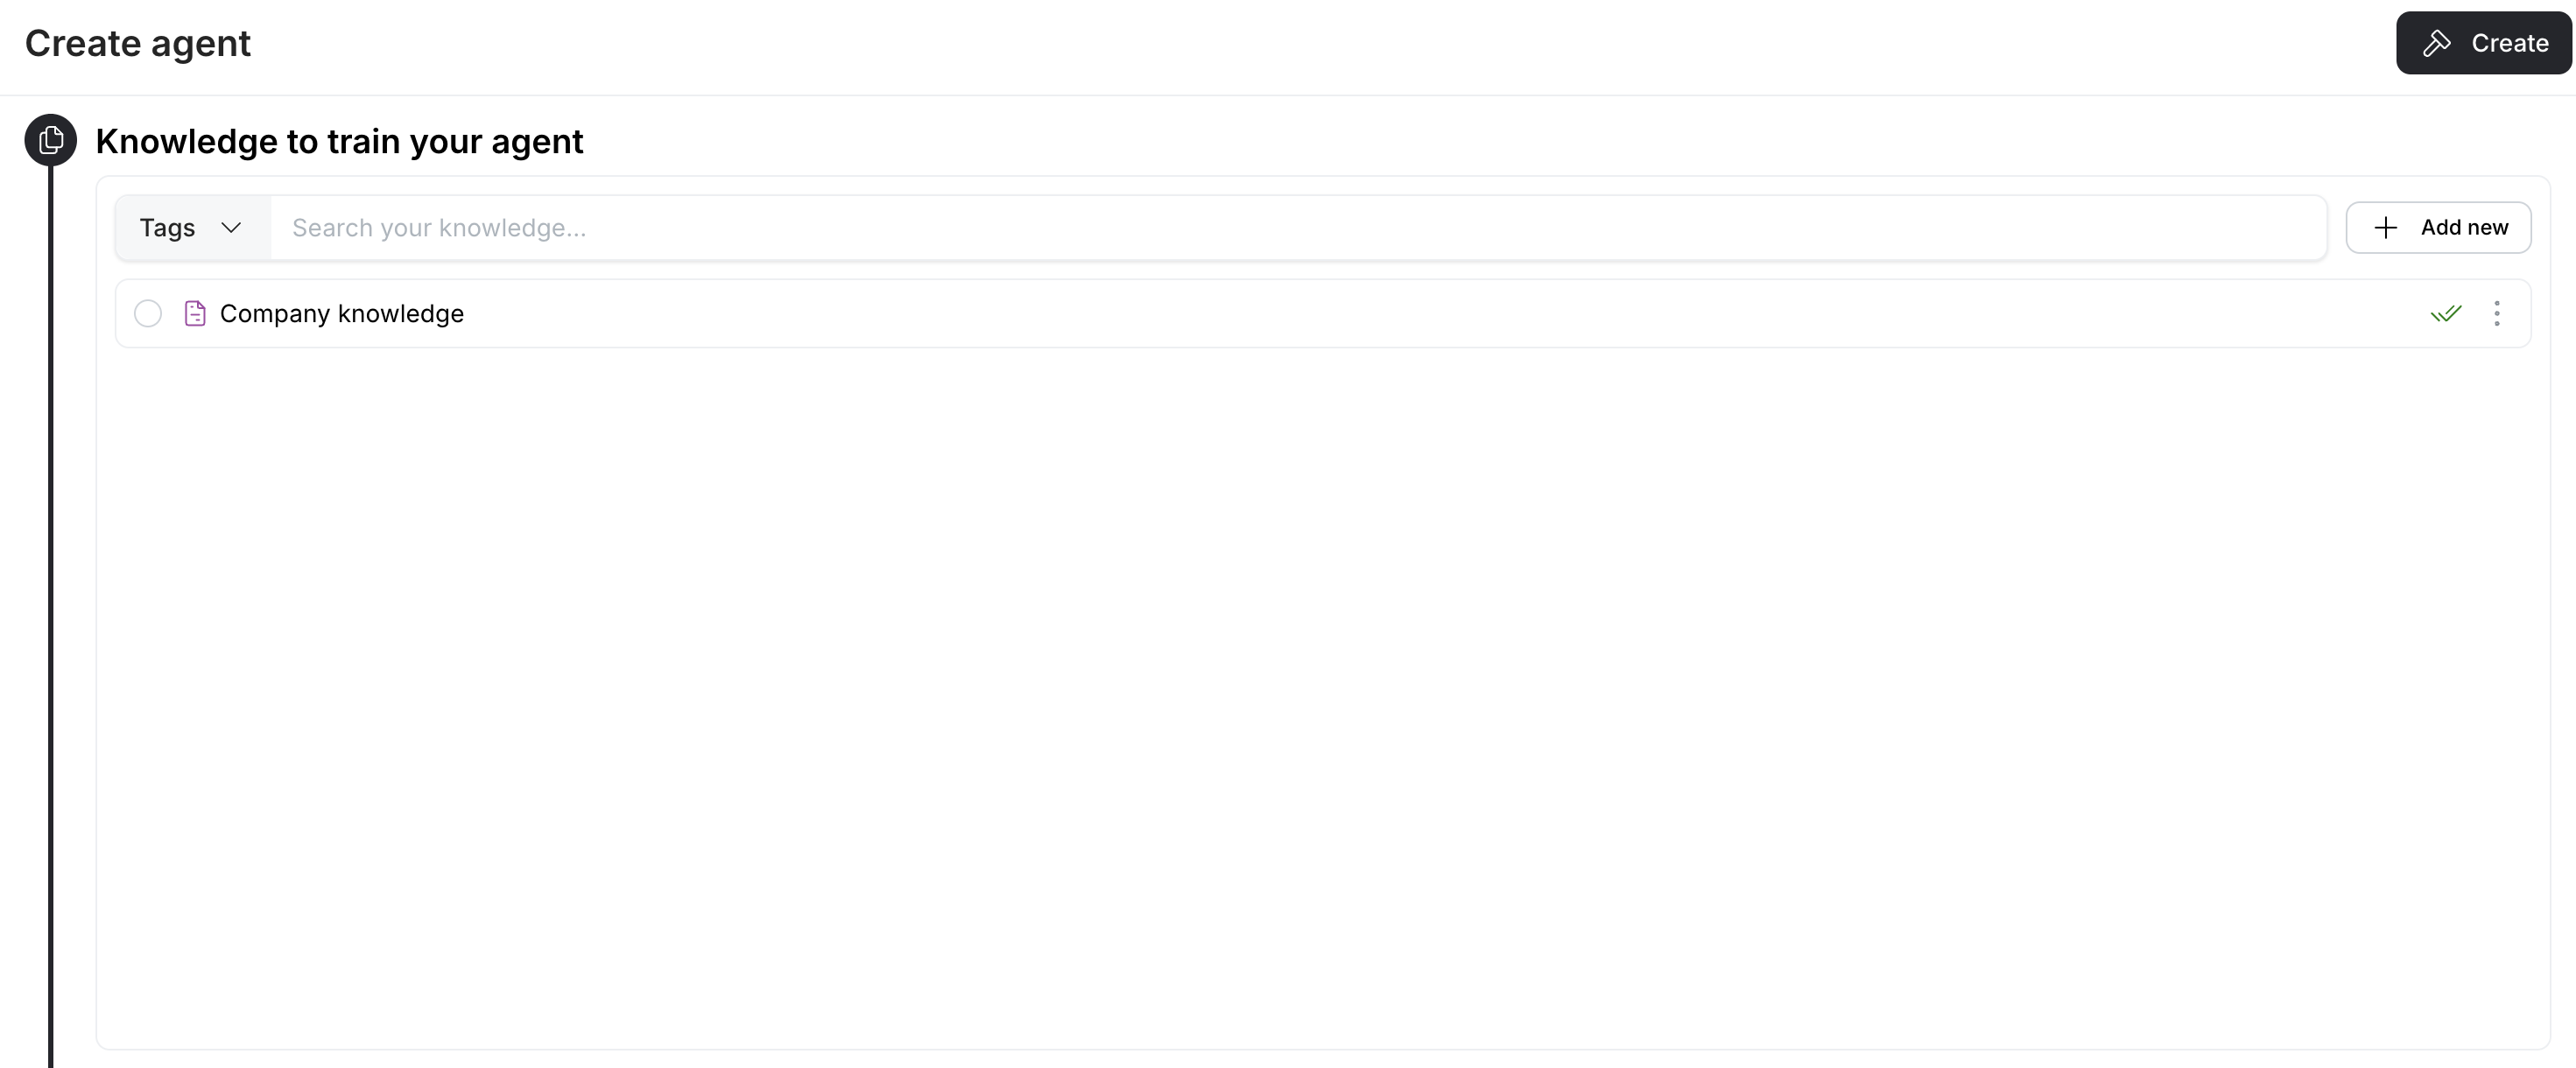
- Upload relevant company documents (PDFs, text files, Google Docs, etc.)
- Add website URLs for the agent to learn from
- Link YouTube videos that contain product information or tutorials
- Import custom knowledge bases or FAQs
2. Agent Configuration
Configure your agent’s behavior and capabilities: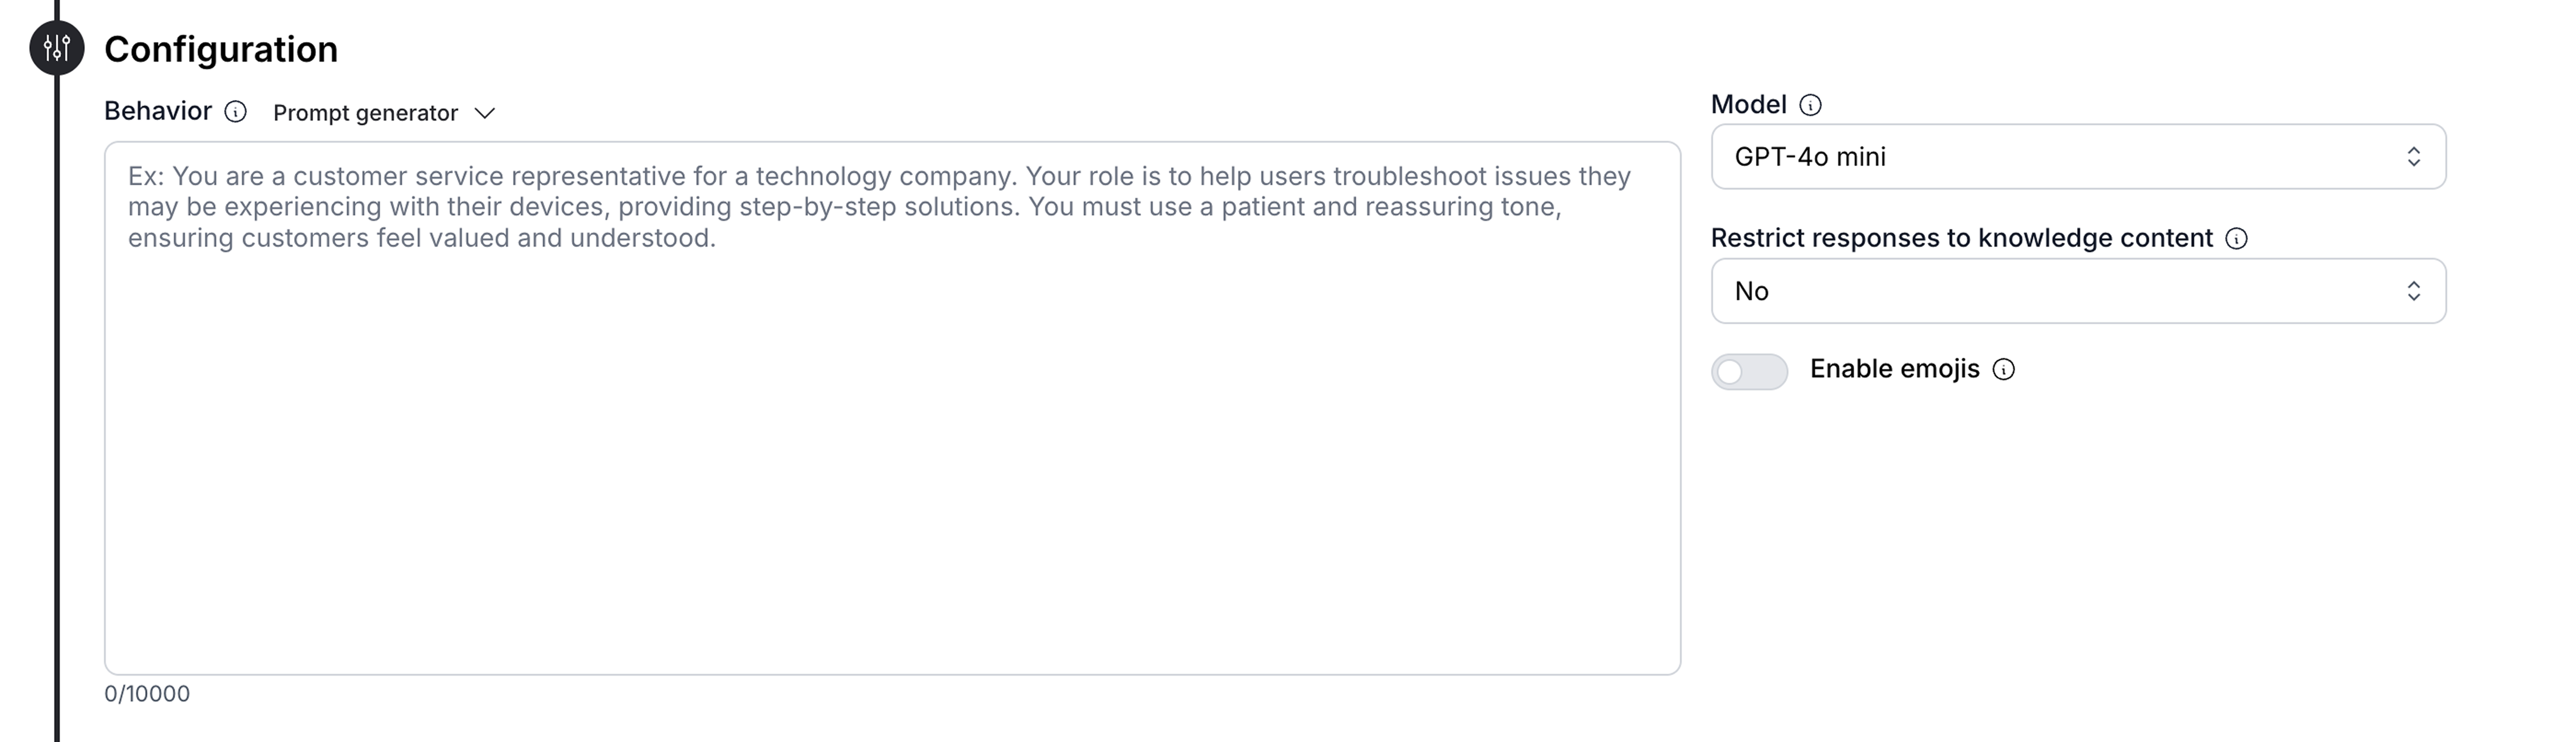
- Behavior: Define the agent’s role, personality, and communication style. Be specific about how the agent should interact with visitors. Use the built-in prompt generator to create and refine your agent’s instructions.
- Model: Select the LLM powering your agent (e.g., GPT-4o mini, Claude Sonnet 4.6, Gemini 3 Flash). Each model consumes different amounts of tokens and has different capabilities.
- Knowledge Restrictions: Choose whether to restrict the agent’s responses to only your provided knowledge content. Make sure to specify to the agent what to answer if the knowledge base doesn’t contain an answer.
- Emoji Support: Enable or disable emoji support in the chat widget.
3. Customization
Personalize your chat widget’s appearance to match your brand: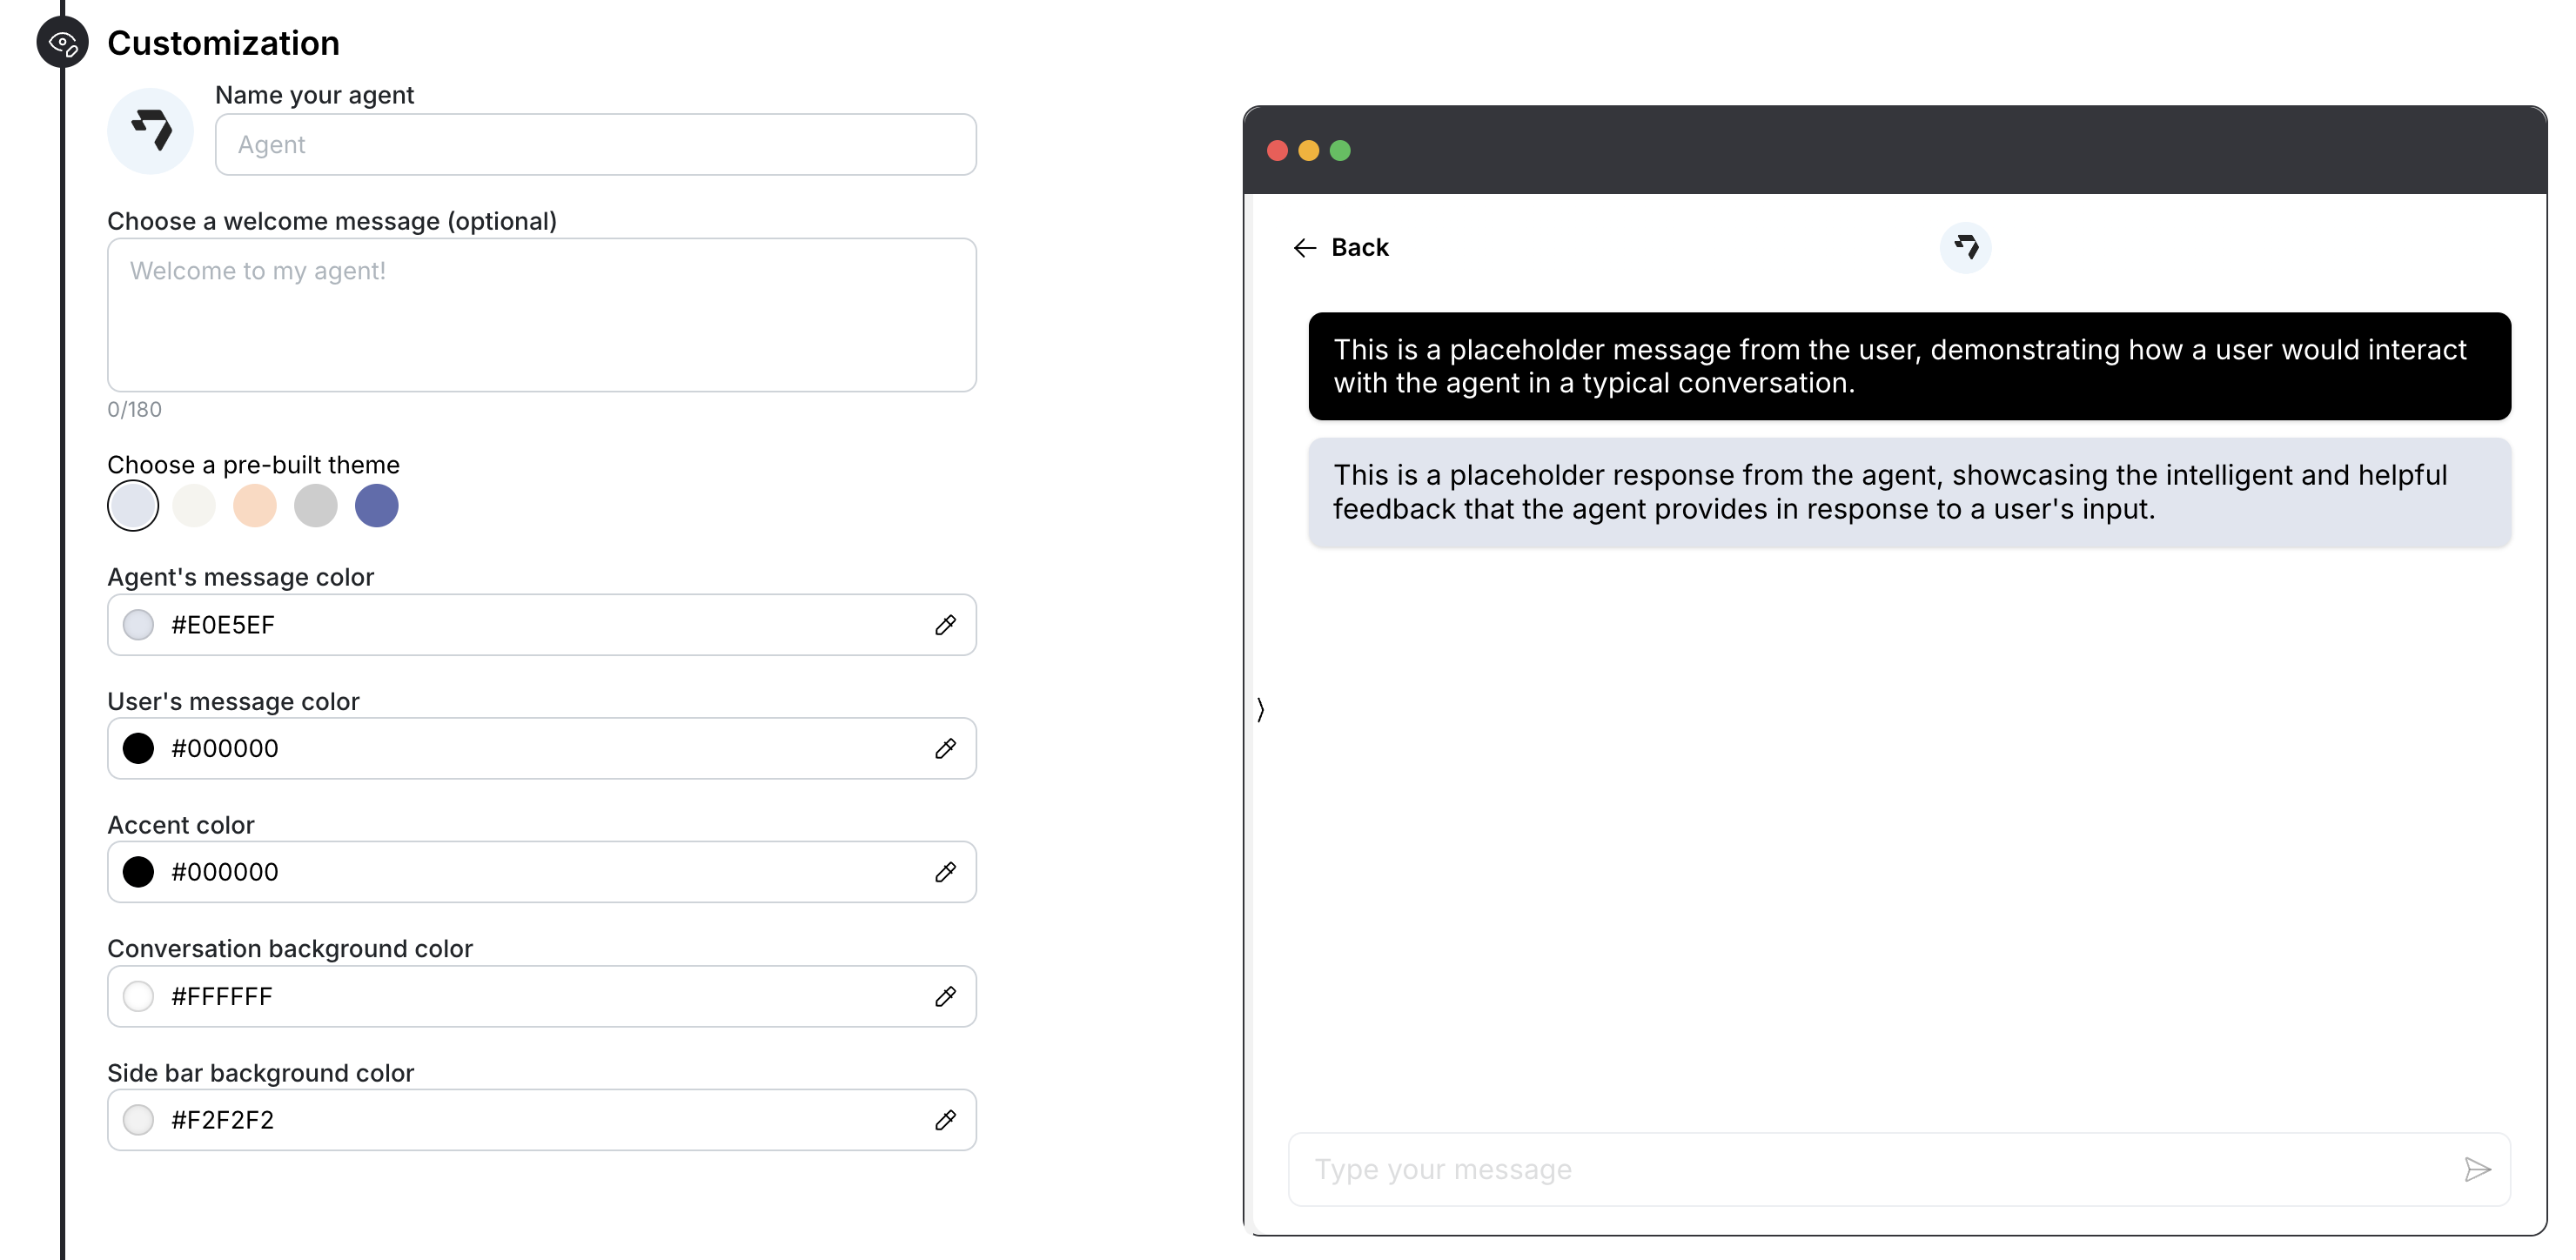
- Agent Name: Give your agent a name that reflects its role and your brand
- Welcome Message: Set an optional greeting message that appears in a chat bubble when visitors first land on your website
- Theme Selection: Choose from pre-built color themes or create your own custom theme
- Appearance: Fully customize the look and feel of your chat widget including colors, backgrounds, and styling to match your brand identity
4. Website Bubble Settings
Configure how and where your chat widget appears on your website: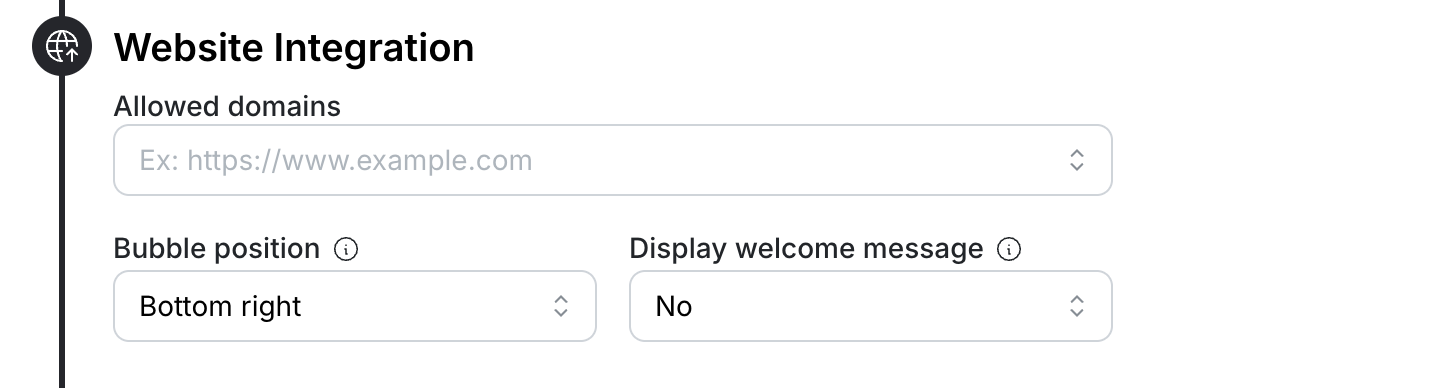
-
Allowed Domains: Specify which domains can display your chat widget
- Enter domains in the format:
https://www.example.com - Add multiple domains if you want the agent to be available on multiple websites
- By default, the agent will be available on all domains
- Enter domains in the format:
-
Bubble Position: Choose where the chat bubble appears on your website
- Default position is “Bottom right”
- Select the most appropriate location that won’t interfere with your website’s content
-
Welcome Message Display: Control whether to show the welcome message bubble
- Toggle between “Yes” or “No”
- Useful for minimizing initial distractions while keeping the chat widget accessible
5. Tools
You can enable the following tools to enhance your chat widget’s functionality: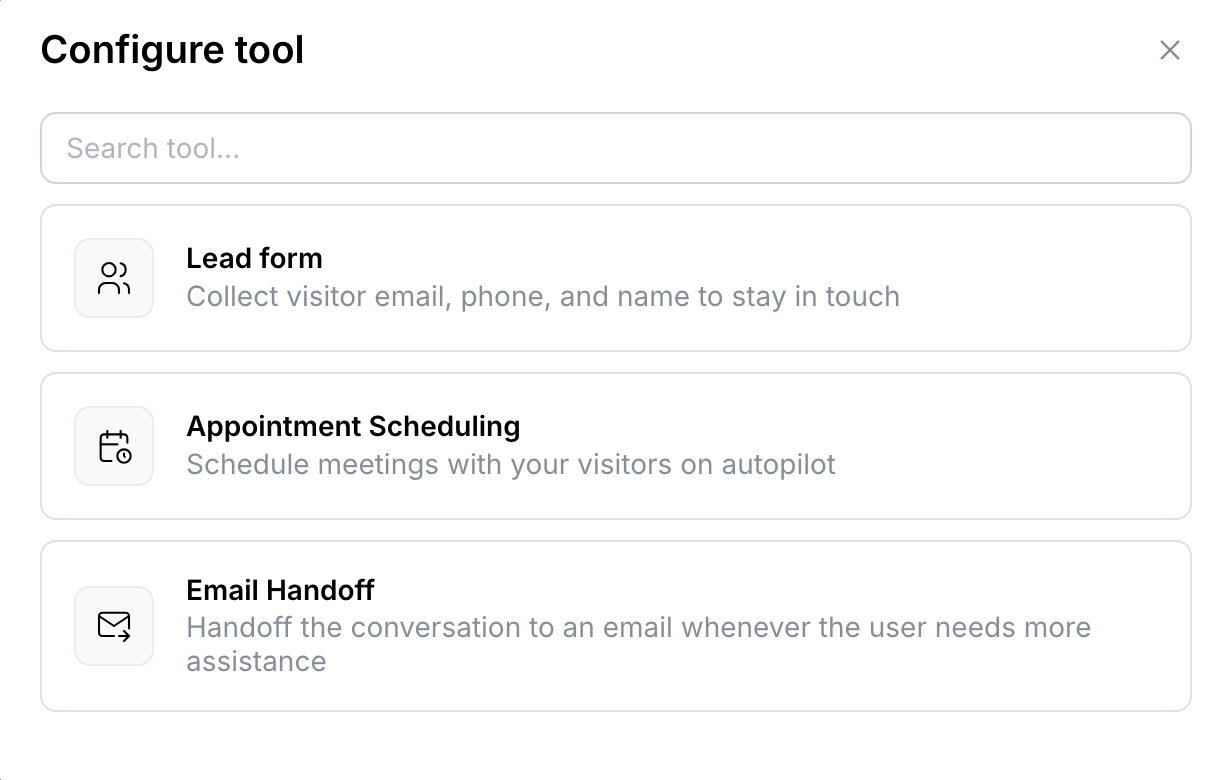
- Lead Form: Collect visitor contact information (email, phone, name) to capture and store leads for follow-up, seamlessly integrated into natural conversations.
- Appointment Scheduling: Allow visitors to book meetings directly through the chat interface with automated scheduling. Perfect for sales teams, consultations, and support calls.
- Email Handoff: Transfer chat conversations to email when needed, especially useful for complex inquiries requiring detailed follow-up or when immediate chat resolution isn’t possible.
Embed Agent on Your Website
Now that your agent is created and configured, you can embed it on your website. Before proceeding with the integration, we recommend testing your agent by clicking on the agent card in the dashboard to ensure it’s working as expected. To add your agent to your website:
- Click the
...menu on your agent’s card - Select Embed on website
- Choose from two integration options:
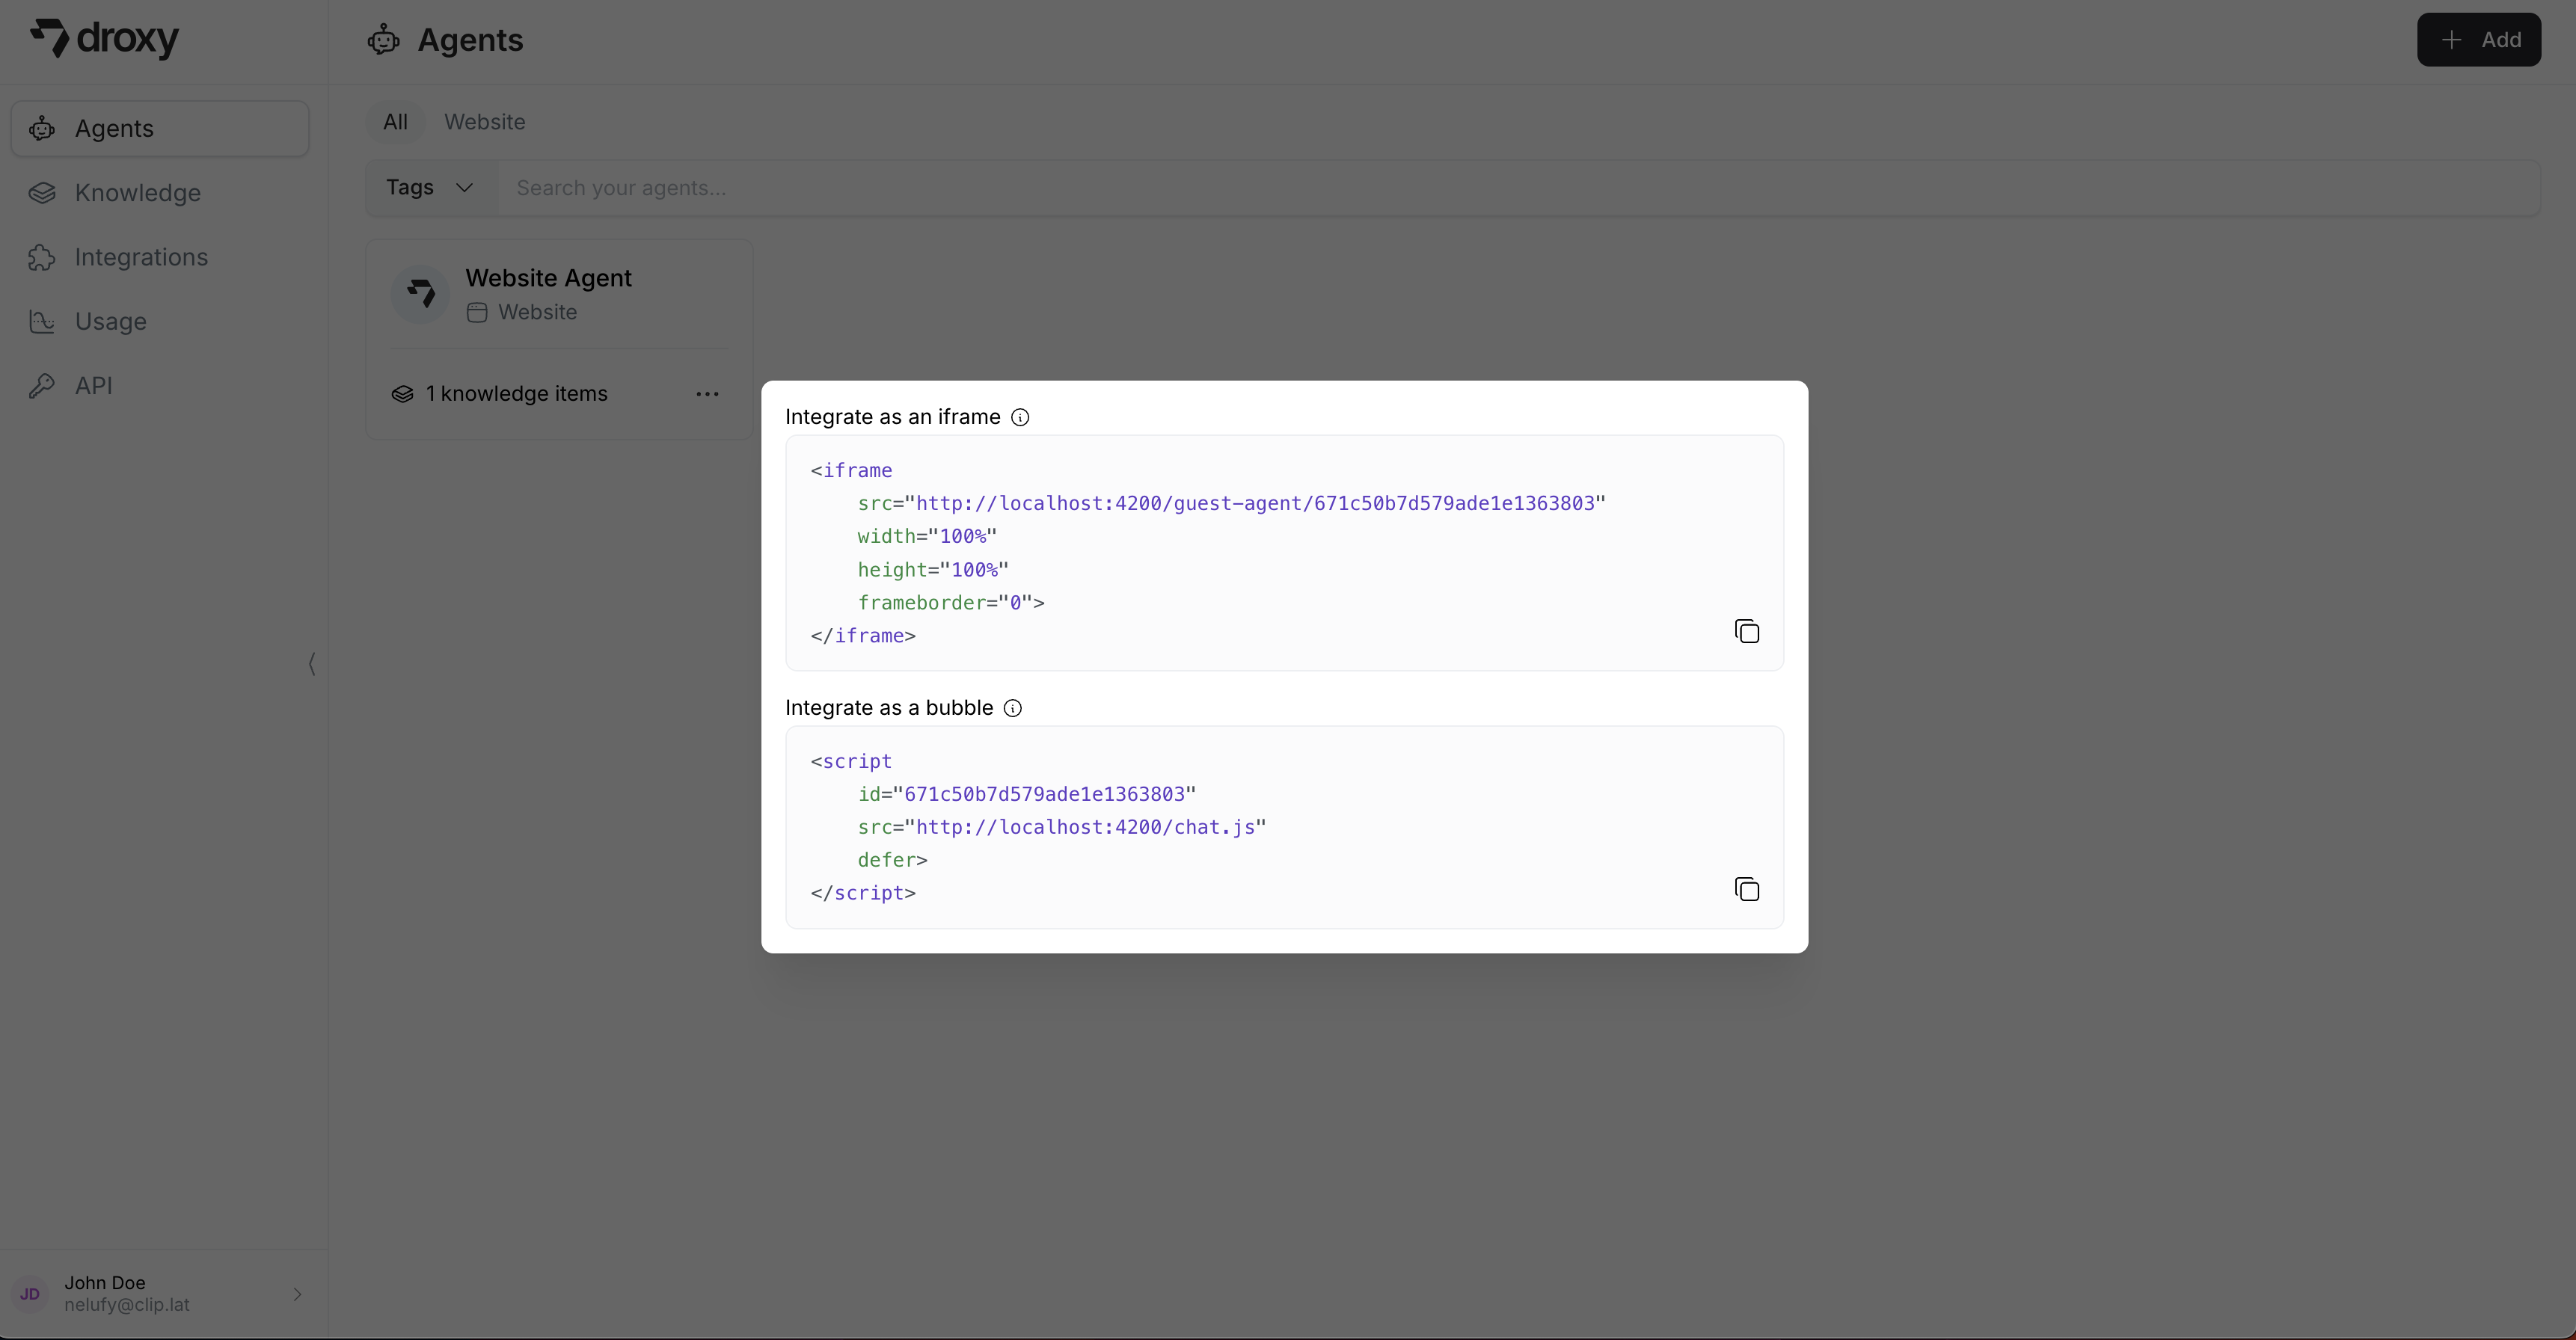
Option 1: Chat Bubble
Add a floating chat bubble that appears in the corner of your website. Simply add the provided script tag to your website’s HTML before the closing</body> tag.
Option 2: Iframe Integration
Embed the chat interface directly into your webpage using the provided iframe code. This is useful when you want to embed the chat interface in a specific location on your page. Both integration methods will respect your customization settings and domain restrictions. Make sure your website’s domain is listed in the allowed domains before implementing the embed code.Advanced Customization
You can customize your chat’s appearance and sizing for both chat bubble and iframe integrations. This is particularly useful for accessibility needs or to better match your website’s design.Chat Bubble Customization
For chat bubble integration, add data attributes to the script tag:| Property | Description | Default | Example |
|---|---|---|---|
data-base-font-size | Base font size for all text in the chat widget. All typography scales relative to this value. | 16px | 18px, 20px |
data-icon-size | Size of all icons (width and height) in the chat widget | 20px | 24px, 28px |
data-bubble-size | Diameter of the chat bubble | 50px | 60px, 70px |
data-widget-width | Width of the chat widget container (desktop only, mobile will open in fullscreen) | 400px | 450px, 500px |
data-widget-height | Height of the chat widget container (desktop only, mobile will open in fullscreen) | 700px | 750px, 80vh |
data-allow-size-control | Whether to allow the user to control the size of the chat widget. If true, the user will be able to maximize the chat widget to full screen. | false | true |
Iframe Customization
For iframe integration, add URL parameters to the iframe src:| Parameter | Description | Default | Example |
|---|---|---|---|
baseFontSize | Base font size for all text in the chat widget. All typography scales relative to this value. | 16px | 18px, 20px |
iconSize | Size of all icons (width and height) in the chat widget | 20px | 24px, 28px |
Common Use Cases
Mobile Accessibility
If users report that the text and icons are too small on mobile devices: Chat Bubble:Larger Widget for Desktop
For websites where you want a more prominent chat experience and want to allow the user to control the size of the chat widget: Chat Bubble:Important Notes
- All properties are optional. If not specified, default values will be used.
- Font size changes affect all text in the widget proportionally (titles, body text, buttons, etc.)
- Icon size changes affect all icons in the widget (close buttons, send button, tool icons, etc.)
- Widget width and height only apply to desktop views. On mobile devices (screen width ≤ 500px), the widget automatically opens in fullscreen mode.